Securing GraphQL API
Learn how you can secure your GraphQL API.
- prevent unauthorized users from performing sensitive GraphQL API queries and mutations
In order to follow this tutorial, you must use Webiny version 5.9.0 or greater.
Overview
The code that we cover in this tutorial can also be found in our GitHub examples repository 
At the moment, all car manufacturers-related queries and mutations that we’ve added to our GraphQL API are publicly exposed.
For example, if were to perform a simple listCarManufacturers GraphQL query, we would receive a list of all car manufacturers:
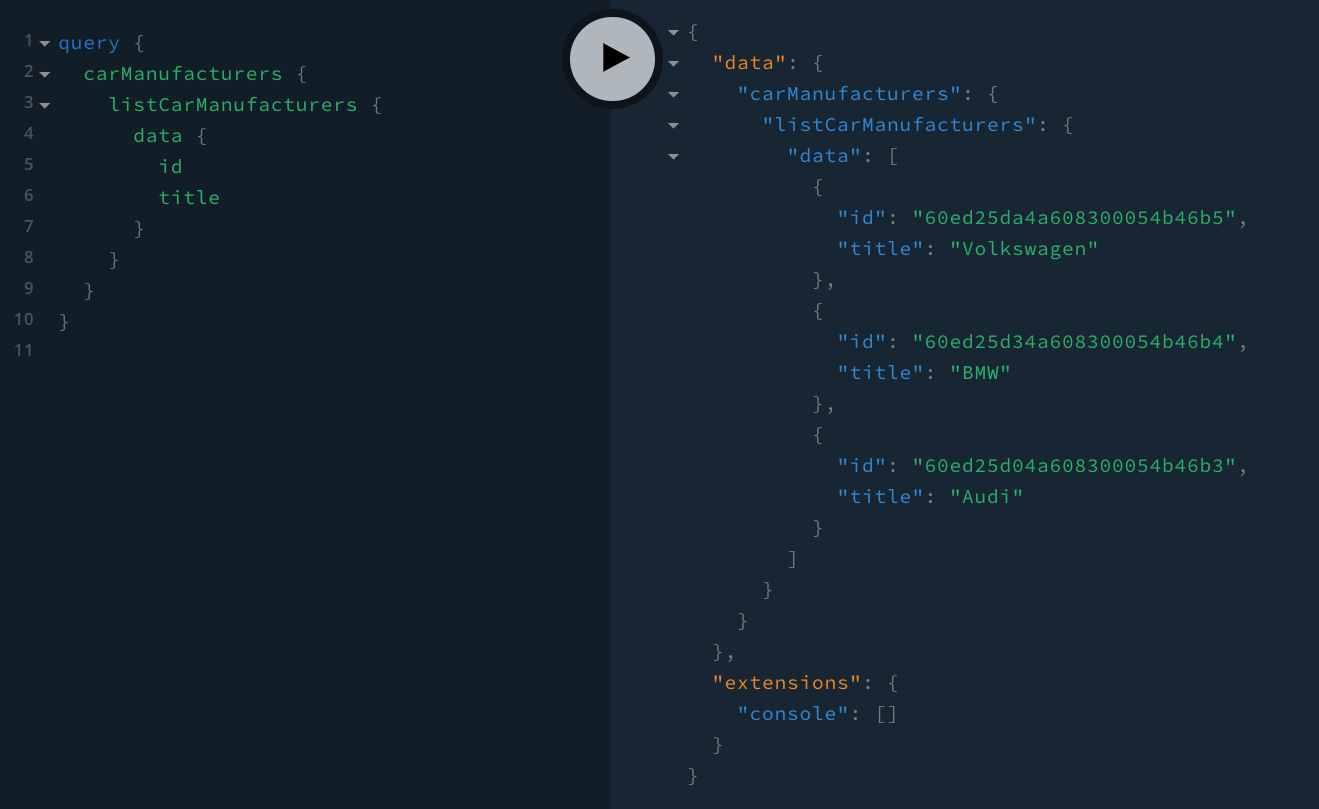 Exposed GraphQL Queries
Even more important, anybody can create new car manufacturers, with the createCarManufacturer GraphQL mutation:
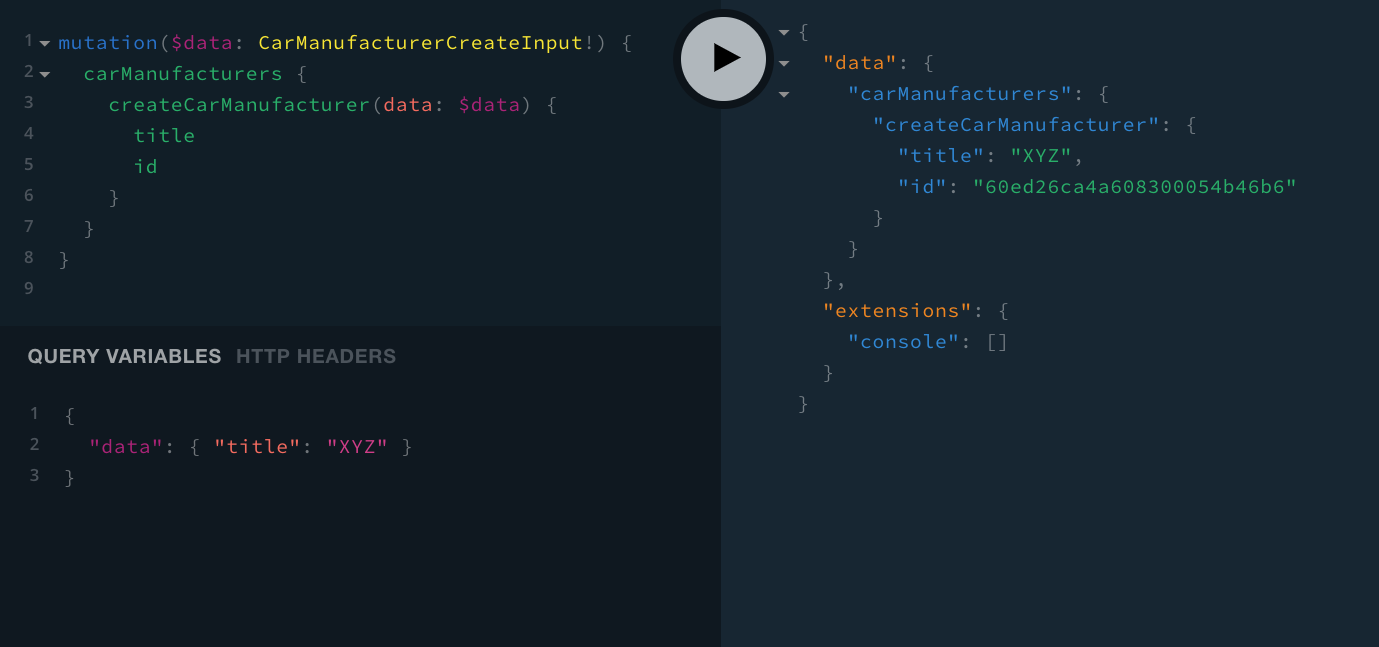 Exposed GraphQL Mutations
In most cases, this is not the desirable behavior, and you’ll certainly want to have control over who can perform these GraphQL operations, and who cannot.
Securing GraphQL API Resolvers
In order to secure the car manufacturers-related GraphQL API queries and mutations, we have to revisit the GraphQL resolver functions that were generated for us via the Extend Admin Area scaffold.Learn more about GraphQL resolver functions in the official GraphQL documentation article 
All of the GraphQL resolver functions are located in the api/code/graphql/src/plugins/scaffolds/carManufacturers/resolvers 
.
├── __tests__
├── entities
├── index.ts
├── resolvers
│   ├── CarManufacturersMutation.ts
│   ├── CarManufacturersQuery.ts
│   ├── CarManufacturersResolver.ts
│   └── index.ts
├── typeDefs.ts
└── types.ts
For purposes of this tutorial, let’s open the simplest resolver function, which is the getCarManufacturer 
import { CarManufacturerEntity, CarManufacturersPermission } from "../types";
import { CarManufacturer } from "../entities";
import CarManufacturersResolver from "./CarManufacturersResolver";

// We use this when specifying the return types of the getPermission function call (below).
import { FullAccessPermission } from "@webiny/api-security/types";

(...)

/**
 * To define our GraphQL resolvers, we are using the "class method resolvers" approach.
 * https://www.graphql-tools.com/docs/resolvers#class-method-resolvers
 */
export default class CarManufacturersQueryResolver extends CarManufacturersResolver
    implements CarManufacturersQuery {
    /**
     * Returns a single CarManufacturer entry from the database.
     * @param id
     */
     async getCarManufacturer({ id }: GetCarManufacturerParams) {
        // First, check if the current identity can perform the "getCarManufacturer" query,
        // within the detected locale. An error will be thrown if access is not allowed.
        const hasLocaleAccess = await this.context.i18nContent.hasI18NContentPermission();
        if (!hasLocaleAccess) {
            throw new Error("Not authorized.");
        }

        // Next, check if the current identity possesses the "car-manufacturers" permission.
        // Note that, if the identity has full access, "FullAccessPermission" permission
        // will be returned instead, which is equal to: { name: "*"}.
        const permission = await this.context.security.getPermission<
            CarManufacturersPermission | FullAccessPermission
        >("car-manufacturers");

        if (!permission) {
            throw new Error("Not authorized.");
        }

        // Note that the received permission object can also be `{ name: "*" }`. If so, that
        // means we are dealing with the super admin, who has unlimited access.
        let hasAccess = permission.name === "*";
        if (!hasAccess) {
            // If not super admin, let's check if we have the "r" in the `rwd` property.
            hasAccess =
                permission.name === "car-manufacturers" &&
                permission.rwd &&
                permission.rwd.includes("r");
        }

        // Finally, if current identity doesn't have access, we immediately exit.
        if (!hasAccess) {
            throw new Error("Not authorized.");
        }

        // Query the database and return the entry. If entry was not found, an error is thrown.
        const { Item: carManufacturer } = await CarManufacturer.get({ PK: this.getPK(), SK: id });
        if (!carManufacturer) {
            throw new Error(`CarManufacturer "${id}" not found.`);
        }

        return carManufacturer;
    }

    (...)
}
If you’re curious about the CarManufacturersPermission interface, you can check its definition in api/code/graphql/src/plugins/scaffolds/carManufacturers/types.ts 
In order to actually compile the code changes we’re about to make and see them in our GraphQL API, we need to run the following Webiny CLI command:
yarn webiny watch api/code/graphql --env devNow, to see this new piece of authorization logic in action, we can use a GraphQL client, for example the GraphQL Playground 
{
  carManufacturers {
    # Replace the `id` with the value that exists in your system.
    getCarManufacturer(id: "60ed25da4a608300054b46b5") {
      id
      title
    }
  }
}Running the yarn webiny info command in your Webiny project folder will give you all of the relevant project URLs, including the URL of your GraphQL API.
Without including the appropriate Authorization request header, we should receive the following error response:
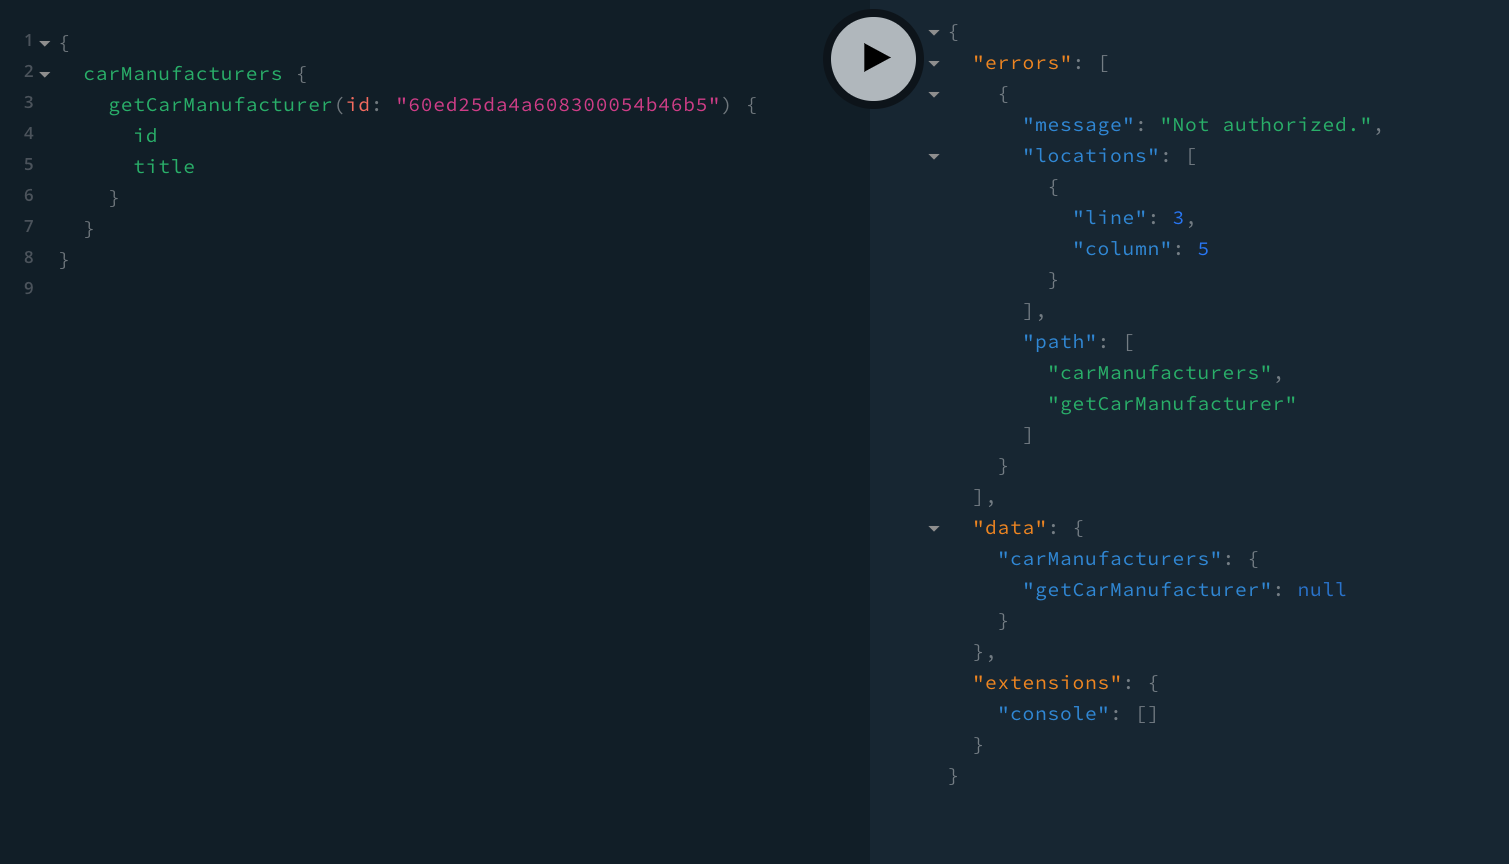 GraphQL Authorization Error
If you’ve received the Not authorized. error, that means authorization was successful.
On the other hand, if a valid Authorization request header is included, or in other words, the current identity actually has access to the Car Manufacturers module, the data should be returned.
To manually test that, we can simply create a new user via the Webiny Security application, and either place it into the default Full Access security group, or even better, into the newly created Car Manufacturers security group. Which is what the following screenshot is showing:
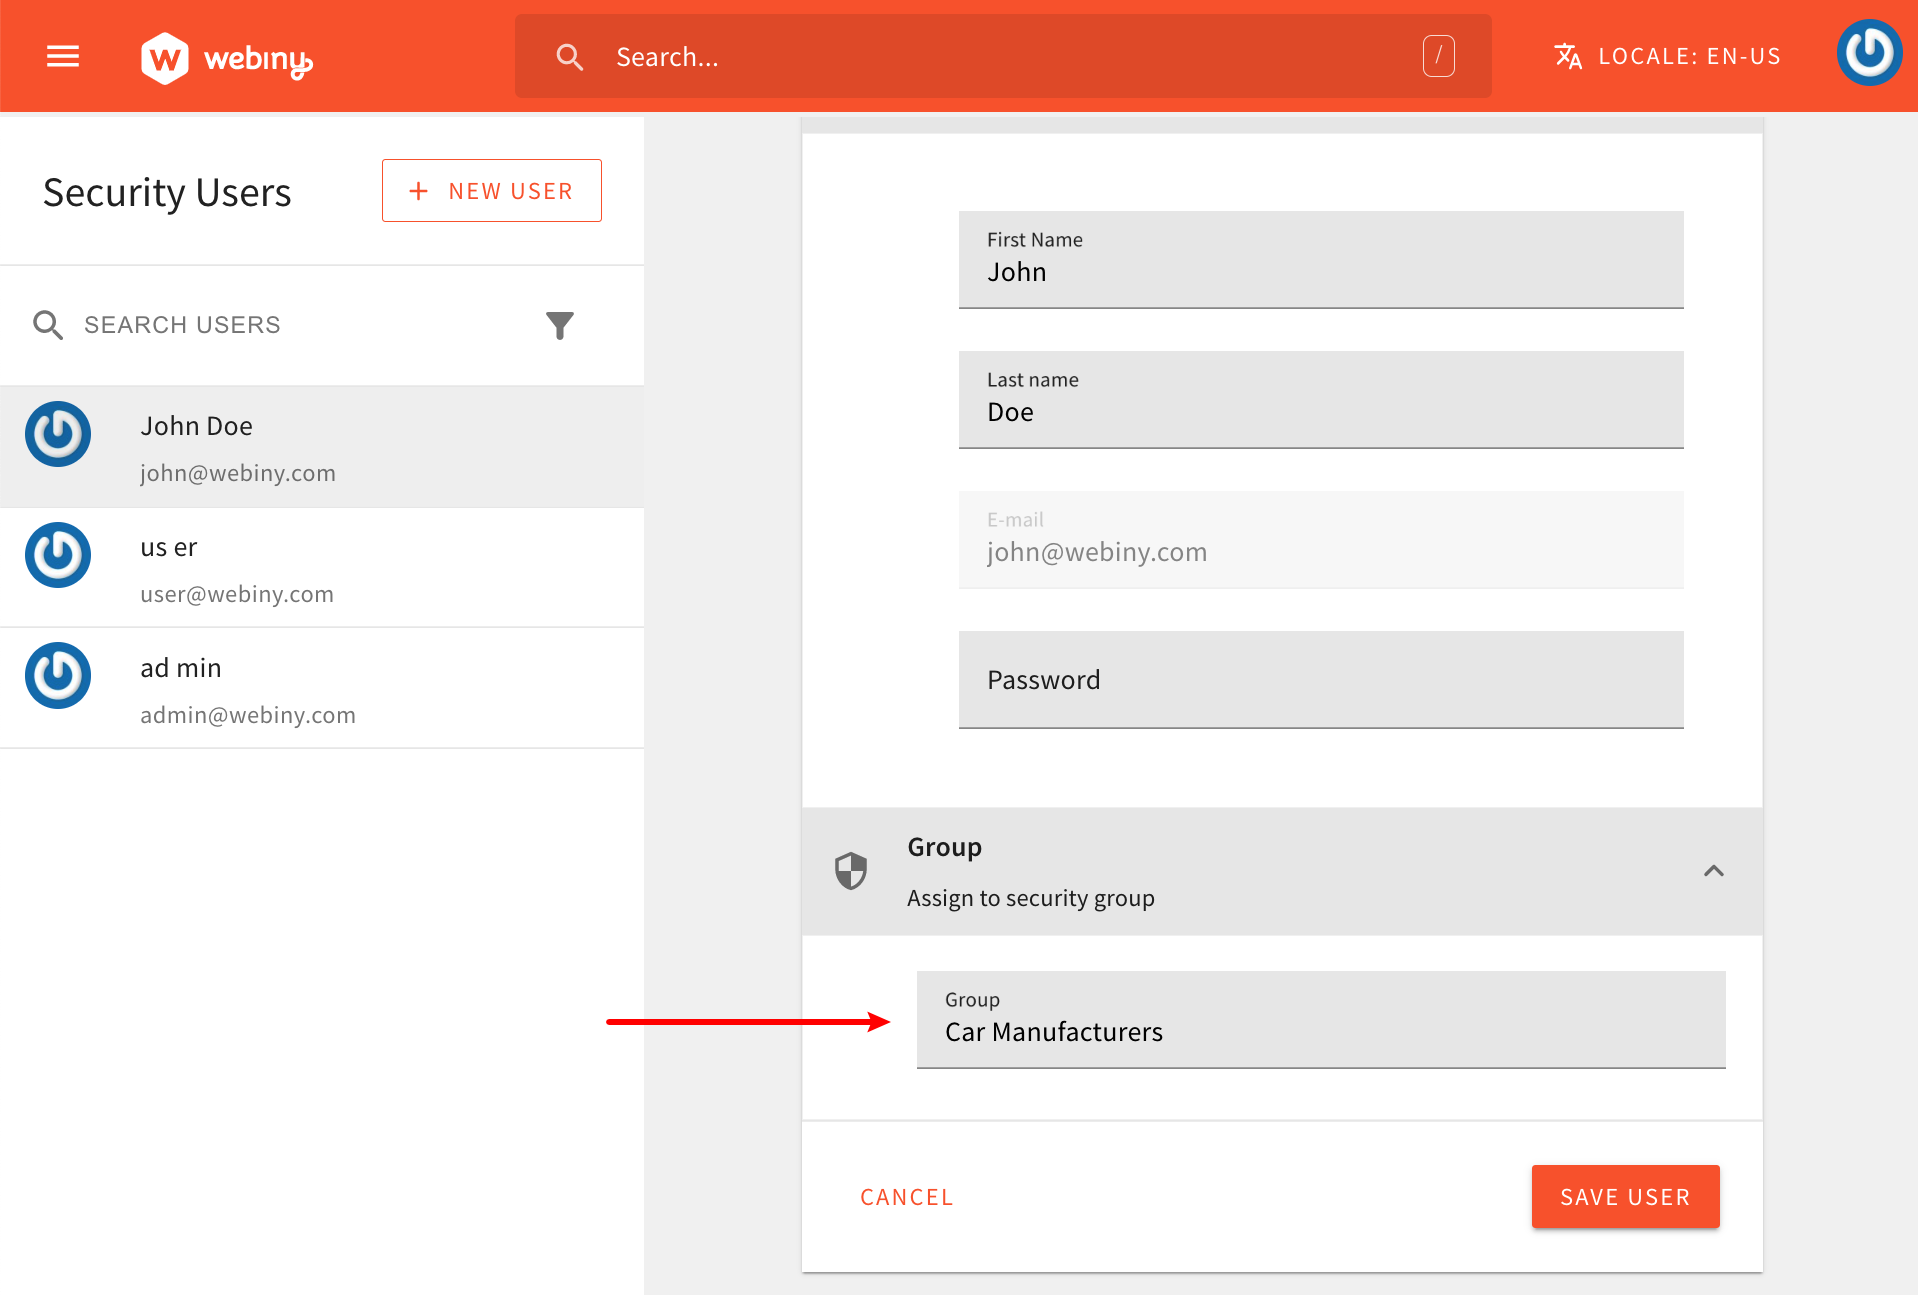 Create a Test User
Once we’ve created the user, we can log in into the Admin Area application with it (using its username and password), and execute the same GraphQL query, this time using the built-in API Playground. We will use this client simply because of the fact that, upon issuing GraphQL operations, it will automatically attach the correct Authorization request header for us. In other words, it will perform GraphQL operations as the currently logged-in user.
So, as we can see in the following screenshot, the GraphQL query was successful, as we’ve successfully received the car manufacturer data in the response:
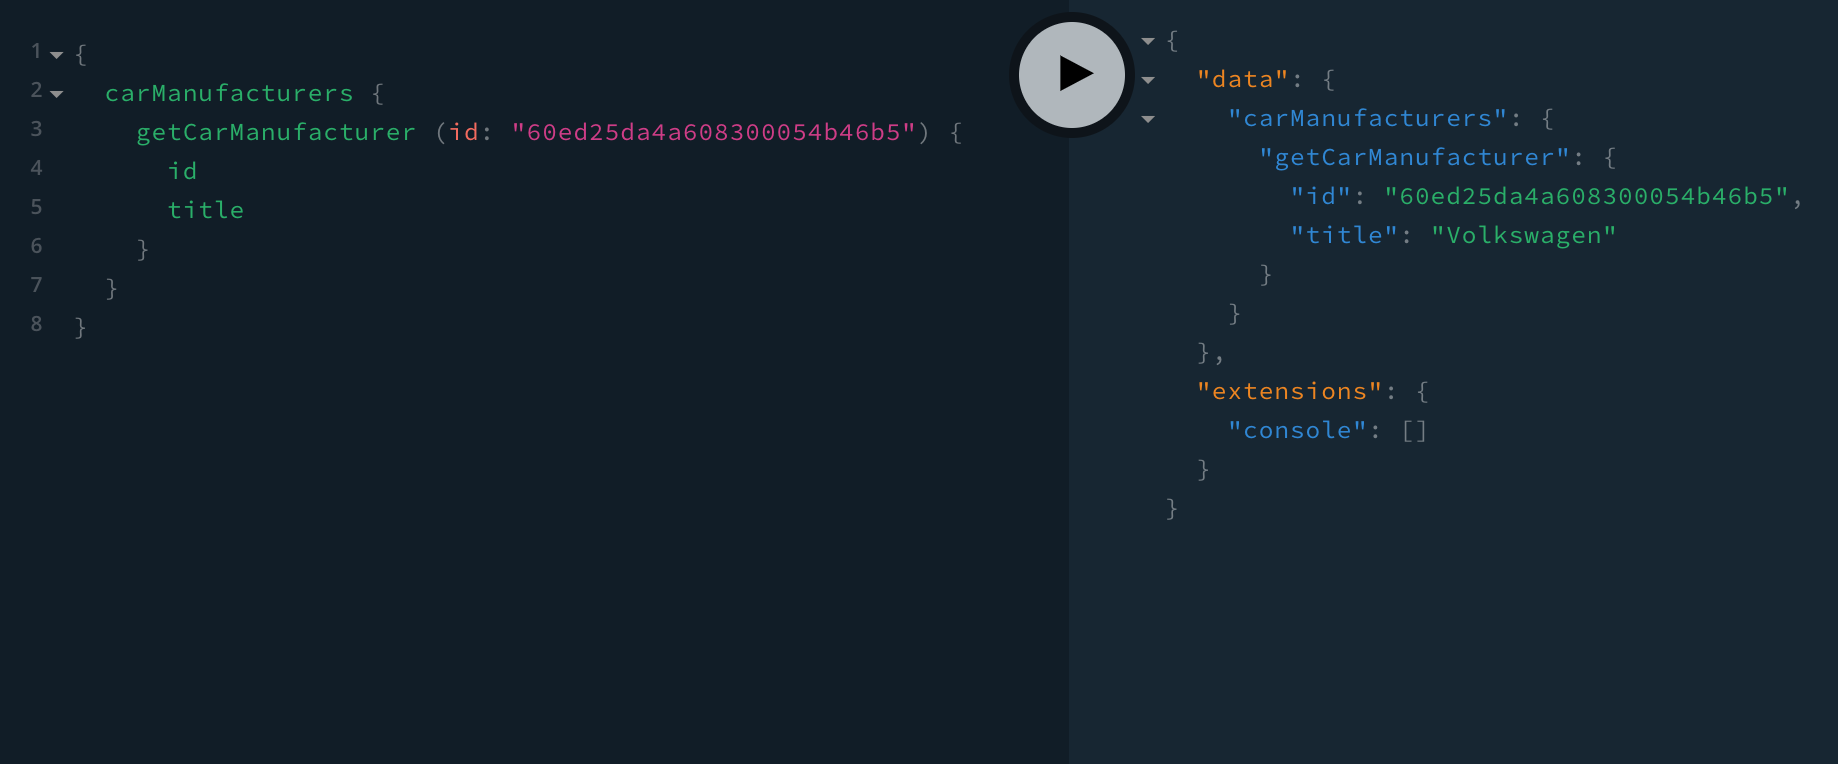 GraphQL Authorization Success
This means that the user we’re currently logged-in with has the appropriate security permissions, and that the newly added authorization code works as expected.
Final Notes
Before we wrap this up, note that this is just a single resolver we secured, and that you should implement the same logic into others 
Also, in case you start seeing yourself copying some of the authorization related code, it’s certainly recommended that you extract it into one or more separate utility functions. This way we’re not repeating our selves (DRY 
FAQ
I'm Not Building a Multi-Locale Admin Area Application Module.
If you’re not building a multi-locale Admin Area application module, feel free to skip the await context.i18nContent.hasI18NContentPermission(); checks in your GraphQL resolvers and simply start with your own authorization checks.
But of course, be aware that if your project ends up being multi-locale, then users will be able to execute GraphQL operations in every created locale. At that point, you will most probably want to bring back the removed locale-related authorization checks.